Friday 25 April 2014

Presentation Compositing and Critical Evaluation

Presentation


          Since my previous blog entry where I had only the key frames of the one character I have now fully animated all four characters, each having their own unique animation ready for submission and presentation.

          For our presentation and cinematic we were given a specific format, codec and resolution to use for the video. We chose to capture the cinematic using an image dump process which occurs when the executable version of our cinematic is running. Each frame that is rendered in the .exe is then captured and dumped into a folder where they can all be composited into a video later on. To do this there were two options that were essentially the same. One option was to use Unreal Frontend, where the package is baked, made into an .exe and then captured. The other option was to edit the 'Target' properties in the UDKLift program when it has been made into a shortcut. Both produced the same results, with the only real difference being the Unreal Frontend had a proper user interface. Whilst David took the rendered images and composited them for the cinematic, I began work on producing the video for our presentation.

For the presentation David and I decided to record ourselves using my laptop camera and software called Camtasia. We wrote a script as to make sure we kept within the time frame of a maximum 10 minutes for our presentation, and recorded each part of the script we had in separate video files so that I could later place them with slides and video when compositing.

The script we had initially made was too long in its first draft. After recording it the time came to a total of approximately 16 minutes long. So we made cuts and condensed the script into the most informative and direct addressing of important points that we could. This happened 3 times and finally produced a set of recordings that lasted just shy of 10 minutes.

I took the camera recordings, the cinematic video and the slides David and I had produced to correspond with our recordings and placed them in After Effects. I chose to use After Effects for the compositing as it is a very powerful and flexible tool for video production that had all the formats and codecs we needed, and I have had previous experience with it.


The Cinematic:


          For submission purposes the cinematic will be at the resolution of 1050 x 576. For this blog purpose it is in 1920 x 1080 as to show as much detail as possible. This version also has music for theatrical affect, but was left out from the submission version as to keep what is shown to only that which David and I have created.


The Presentation:


Critical Evaluation:


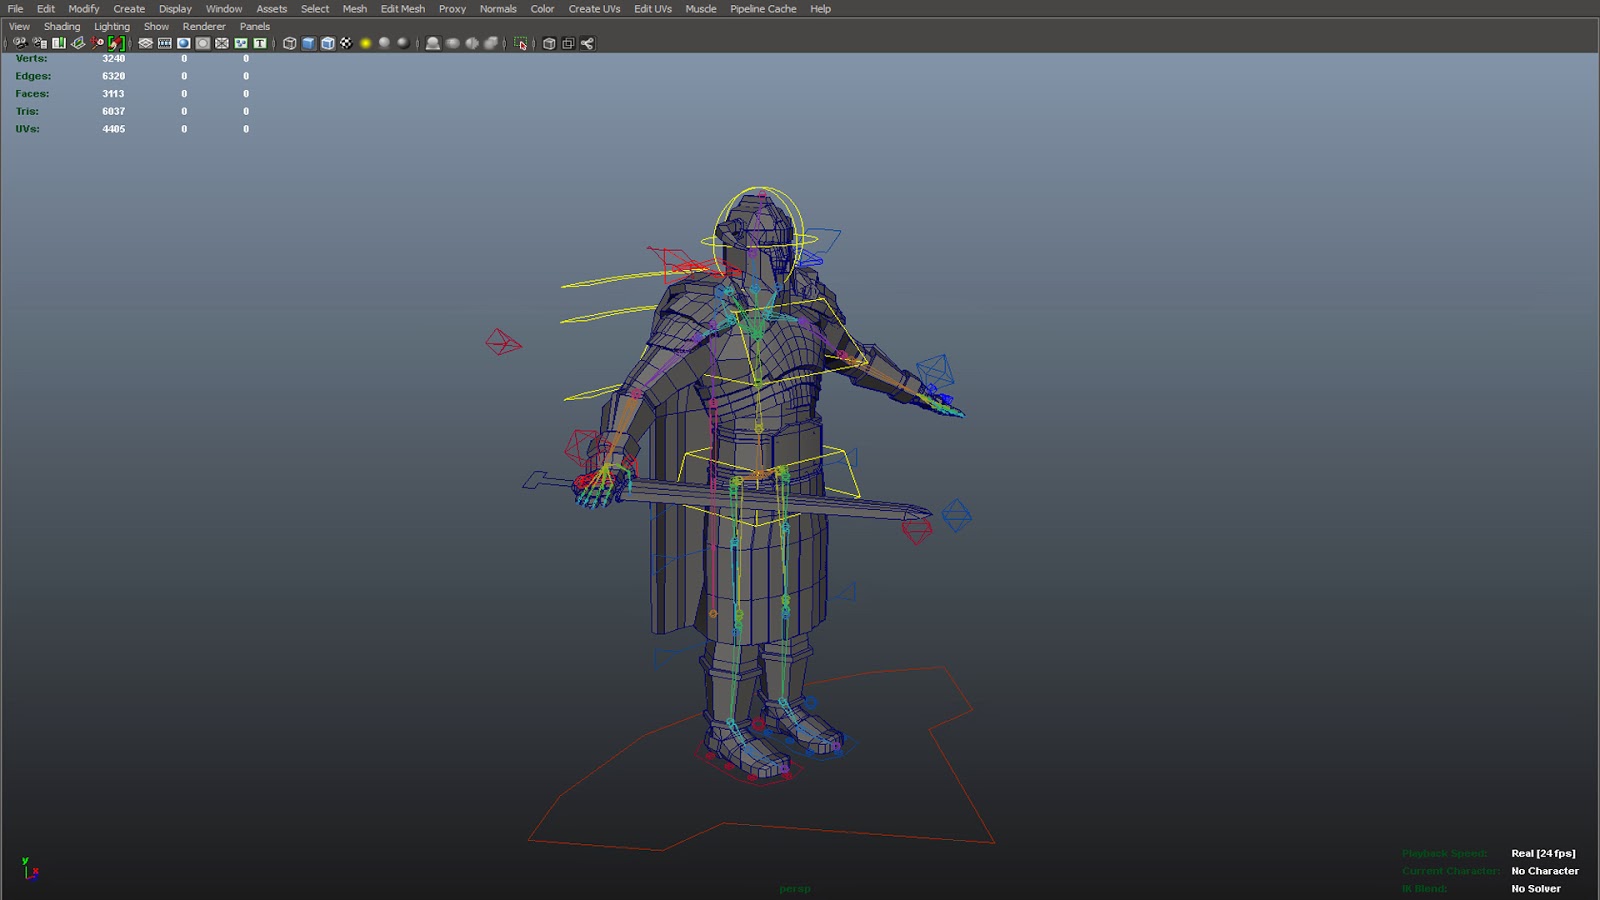
          If we take a look at the schedule on the blog entry for the 5th of February you can see that for the most part I've managed to stay on track with the micromanaging tasks and deadlines I made for myself, as well as the important milestone deadlines. However in the last few weeks of this project I found myself struggling to keep up with the deadline for the final animations, ready for rendering and presenting. I can only attribute this to the unforeseen circumstance of the rig not working as intended in regards to the master controller, which I have detailed in earlier blog entries; animating 4 unique characters (not in appearance) without the use of a master controller took a lot longer than I had hoped to spend on the animations, which impacted the quality of them also. I believe them to be good, but had I not had the issue with the rig I know I could have produced something better. That being said I am happy with the final cinematic.

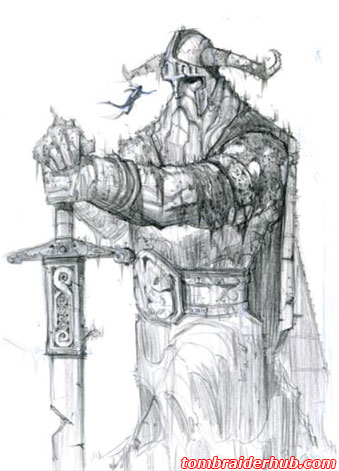
I found the work I have done to be very informative for future ventures into character modelling should I decide to try again. Learning this process has allowed me to understand the technical constraints on character modelling and rigging. My character model was very low polygon as I thought this was best to help emphasise the stone structure that it would be shown to be made from. However I have come to realise that regardless of the polygon count, more polygons should always be spent in the topology of the character that allows for deformation when animating. For example, if I were to make another character or redo this one then I'd make sure to spend a few more polygons around the shoulder and armpit, and to direct the edge flows as to allow them to stretch and compress in a manner that wouldn't negatively affect the structure of the silhouette of the character or the textures on it. I did research into this, where in an earlier entry you can see the .gif image of the shoulders rotating on a modelled torso, but evidently did not implement this as well as I should have.

          To improve on what I have done for the cinematic I think reducing the characters to a total of 3, and giving them more polished animation would be one of the best improvements. I did not have enough time to implement the principles of animation to a standard I wanted, and I think reducing the character count would allow me to focus time on them to do this. This would also suggest finding a better way to estimate and manage my time and deadlines.

I would also think about creating an emissive texture for them, so that when they come to life in the cinematic their eyes and cracks on their body would glow or pulsate a cold blue colour, as it was suggested that David could do this on the runes found around the environment, I think doing this would complement that.

I would also consider creating a new rig, simplified for cinematic use, as the current rig is targeted for game purposes where the engine controls the world translation of the character and not the rig.

          As an overall evaluation of the project I would say David and I worked well together and gave feedback in a constructive manner that helped bring the quality of our work to higher standards. The cinematic reads well and I would say that the audience can understand what is happening in the scene, as well as understanding the scene itself. So in regards to the task of bringing the initial environment concept art to real-time 3D realisation, I would say we have accomplished that.

Wednesday 12 March 2014

Alpha Presentation and an Overall Update

Alpha Presentation


          David and I had our alpha presentation recently, and from the response and critique of our lecturer I believe we did an excellent job.

David's environment is ahead of schedule, and besides a few possible improvements that our lecturer suggested, the environment is complete. My animations were in 'key frames'-state, i.e. they had no in-between frames, but presented the strong key frame poses that followed the timing of the storyboard and cinematic. The first few seconds of the character coming to life were already fleshed out with in-between frames, and I had intended to do that for the whole of the cinematic ready for alpha, however issues I had with the rig and texture outputs caused me to be behind in my personal schedule (issues I will detail later in this entry). That being said, considering the definition of alpha stage, my animations were alpha-level, as nothing would now change except the completion of the animations; the alpha-level animations communicated what the final cinematic would look like.


)


Overall Update

          Currently I have the textures for the character and sword finalised, with a possibility of using an emission texture later on for the eyes and maybe some of the cracks. The animation for 1 of the characters (as there are a total of 4 statues) is partially fleshed out, and fully blocked out with key frames in place. Only in-between frames are left to do for that one. The other 3 will have similar animation, but varied in the way they wake up and the way they do their battle cries in order to make each seem unique in the sense that they are separate entities even though they look identical.

          Leading up to the alpha presentation I had a few issues that meant we were not ready as early as we thought.

I had completed the textures for the character using poly painting in ZBrush and was ready to export them, however without realising I had used the wrong base mesh that had incorrect UVs, which mean when I tried exporting the texture map from ZBrush there were parts of the UV missing or incorrectly placed. I had 2 base meshes for the character, 1 was the actual low poly mesh that would be used in engine with the rig and the other was low poly with parts of the mesh altered in order to prepare it for ZBrush (it had triangle polygons converted to quads and also had extra edge loops in order to spread poly distribution so that it would sub divide without causing stretches). I had some how imported the wrong one for use in ZBrush.

ZBrush allows you to reimport the low poly mesh that you started with, so that you may update things such as UVs yet still keep all the sculpting that you have done in the higher sub division levels. I tried doing this but realised that because I had altered the mesh in preparation for ZBrush (more edge loops etc.) meant that ZBrush saw it as a completely different mesh, and therefore when it applied the sculpted sub division levels it caused it to soften edges and destroy the work I had put into it. For a long time I couldn't find any solutions and thought that I would have to start over, meaning the days I spent working on the high poly sculpt and poly painting would be a waste. Thankfully I was in a 2nd year lecture at the time of trying to find a solution, and the lecturer (Leavon Archer) was highly knowledgeable in ZBrush, and knew of a solution to my problem. Since I was using poly painting in ZBrush Leavon told me that the initial base mesh's UVs don't matter, as you can export the high poly sub tools (individual meshes) as .obj files which contain the colour information on a per-vertex basis. xNormals, which I had been using for normal and AO map baking, also has the ability to bake diffuse texture maps using the per-vertex colour information. This solved my problem and saved me a huge amount of time in redoing all that work in ZBrush.

I took this diffuse texture and applied the ambient occlusion and cavity maps to it in Photoshop. The AO was to give it shadow and light details, and the cavity map made the smaller details pop out in the diffuse, which the AO can struggle with. I also removed the solid black shadows that you can see in the AO bakes at the bottom left of the AO, and used a dodge and burn layer in Photoshop to bring it to the same light levels as the rest of the texture.

Diffuse texture derived from high poly bake of vertex colour information to low poly, with AO and cavity maps applied
          Running up to alpha I re-baked my ambient occlusion map for the character as I realised that sadly when batch baking all the individual meshes at once in xNormals it puts them all in the same 3D space, and so light information was being taken from meshes that were close together. I therefore redid the bakes, but on an individual basis. The differences can be seen below:

AO batch bake


AO re-bake - individually baked
As I was running short of time for alpha, the sword only had a diffuse map applied to them. Since then I created a normal, AO and cavity map, and applied them. I also increased the texture size for the character to 2048 x 2048, as to make sure I was ready for alpha I baked them at 1024 x 1024 for the sake of baking time. 2048 x 2048 allows more detail to be applied as it creates a larger texture space, though I would be quite happy leaving them at 1024 as at that size the quality is still quite high, but as this is for a cinematic I am going for 2048 as it increases the detail quality but isn't excessive like a 4096 texture would be. The sword texture size is 512 x 512, though I recognise that for game purposes it could easily be acceptable to use 256 x 256.


Sword diffuse with AO and Cavity maps being applied in Photoshop, at 512 x 512 texture size.
          The final update for alpha I will mention are the problems I had with the rig. The rig had 3 main issues, 2 of which are still persistent now. The first issue was that when I imported the rig and animations together as an .fbx file, the skeleton was moving as intended and so was the majority of the mesh. One part however, the right arm, was moving erratically despite the right arm of the skeleton moving correctly. After trial and error I solved the issue by importing the skeleton and mesh as one .fbx file in the rigging 't-pose' that had no animations baked onto it at all. From inside UDK I then imported the animation as a separate .fbx file and applied it to the skeleton inside the engine. This corrected the issue. As a side note, with all the issues I've been having with the rig, I've found my work flow needs to be as follows: animate the rig using control curves, bake the animation to the bones, delete everything except the mesh and single skeleton joint chain, clean the scene and then export the animation.

The second issue, that still persists, is the inability to use the master controller on the rig. I would normally translate this in space and then apply walking animations to the legs that moved in time with the master controller speed. It's a great way to block out timing and spacing, and then apply the walking motion of the legs. However, because this rig was aimed at game use (where the character stays in one spot regardless of the animation sequence, and is then moved in world space via the engine in game) the master controller applies no translation or rotation values to the skeleton root. Therefore I have to leave the master controller where it is and select each controller and move it in time with the rest. It's not a big issue, but it means that I cannot 'zero-out' the controllers if I want to start fresh because this would reset them back to their default positions back at the master controller. It makes this rig inefficient for cinematic animation, and in the future I will build cinematic rigs with master controllers that apply translation values to the skeleton.

The final issue is that I had to alter the type of animations that I wanted to do because of the inability of my rig to let me control the sword the way I had wanted. The rig doesn't allow me to leave the sword in a position and continue to control the hand that was holding it as a separate movement. I found the solution to this, rigging 'space-switching', but for an unknown reason I cannot get this to work with my rig. Space switching allows me to set the translation information of the sword to be controlled by two or more different points (E.g. The hand and the floor) through the use of interchangeable governing parent constraints. I couldn't get this to work with my rig, and I am not sure why, but as it isn't imperative to have this on my rig I weighed up my options and decided to not waste time trying to solve why I couldn't apply it, and instead changed my animation slightly so that the character did not pick up the sword and instead already starts off with the sword in it's hand.

Friday 28 February 2014

ZBrush Sculpting and Texture Maps


Sculpting in ZBrush


          Whilst preparing to animate once I had received the environment sent to me from David, I began finishing off the character sculpt I started several days ago. All that is left is to do the sculpting for the sword a little later on.

I began the process by importing the meshes separately as sub-tools so that I could work with high levels of subdivisions without having tens of millions of polygons on the screen at the same time; I just hid the sub-tools that I wasn't working on.  I would like to say I recognise that although my mesh is far from being organic, I don't think what I was doing could be strictly defined as hard-surface sculpting, as that tends to include the use of slicing into a mesh at hard angles using slice, curve and clipping tools in ZBrush, however the final result I was aiming for wasn't organic by any means.


I had been advised by David that the best brushes to work with for the type of stone ageing and damaged effect were 'clay tubes' and 'mallet fast'. These brushes worked great, and I also discovered a technique for making cracks using the 'dam standard' brush to make sharp and deep cuts into the mesh, and to then use the 'pinch' brush to pull the edges in, making it even more sharp. I'd then chip away at these cuts with clay tubes brush to make it look more stone like. Using these brushes I worked over the whole character.

The higher amounts of detail and more realistic cracks were put in through the use of alphas in ZBrush. ZBrush had no alphas that were helpful to my character, therefore I had to learn to make my own. Taking a few different types of cracked textures from a Google image search and placing them into Photoshop, I played with the levels and contrast until the cracks were dark and the rest of the information was washed out. Once imported to ZBrush I used the 'inflate' brush on the character as to not affect the mesh structure and push the alpha through onto it.


Cracked Alpha 1

Cracked Alpha 2
Whilst sculpting there was an issue with the reversed side (or back face) of the mesh being affected if I sculpted too deeply into the front of the mesh. I tried smoothing out the side that I didn't want to be affected, but this removed the details I wanted on the front side too. Thankfully I have a friend, Josh Williams, who does character modelling and uses ZBrush a lot for it. After speaking with him he suggested turning on 'back-face masking', an option hidden in the brush menu. This solved the issue instantly and there was no longer accidental sculpting on both sides of a mesh.
Another issue I had was only found after I had baked out the normal map. I was using a feature in ZBrush called 'noise' in the surface sub-menu. With a bit of tweaking on the graph this feature was great for producing tiny chips. I didn't realise that you had to press the apply to mesh button, and until you do the feature was only visually represented within ZBrush and would not be included in the actual mesh export. I noticed it when I couldn't see the detail in the normals, and so had to apply the noise in ZBrush and re-export the meshes and re-do the normals. It wasted about an hour, but at least I've learnt this for next time.

Inside ZBrush
Inside ZBrush
Normals applied to Low Poly

Normals applied to Low Poly

Normals applied to Low Poly


Texture Maps


          For the diffuse map I plan on using ZBrush's poly painting tool. For everything else xNormal was used. The size of the maps will be x2048 as I plan to carry as much detail from the sculpting across as possible, without using excessive sizes like x4096.

For the normal map I checked the results of xNormals on default (see fig. 1). They were decent but I found a few issues, such as stepping in lines caused by only a 1x Anti-Aliasing as well as information from a different part of the character leaking onto another part. I realised this was because they were in very close proximity of each other. To better this I changed the Anti-Aliasing to x4, the edge padding to 8 (16 seemed excessive) and the 'maximum frontal and rear ray distance' both to 1 instead of 0.5 (see fig. 2).

Fig. 1  Normal map with issues highlighted in red. - xNormals on default settings
Fig. 2 Normal map, issues resolved. - xNormals with 4xAA and Ray Distance set to 1
The AO map has similar issues, with ray information being applied to other close proximity meshes (fig. 3). This was solved by the ray distance being set to 1 just like in the normal maps. For the AO I looked at a guide found on the internet which suggests good settings to work with for the best results, which indeed did produce better, more detailed results (fig. 4).

Fig. 3 AO issues highlighted in red - poor detail and mesh clipping
Fig. 4 AO with solved mesh clipping and much greater detail.

Finally I produced a cavity map extracted from the normal map. I'll be applying this and the AO to the diffuse once I've created that using poly painting.

Fig. 5 Cavity map extracted from the normal map
          Animation is my priority since I have now received the environment models and package for UDK. I will be working on the animation and alpha-state diffuse textures ready for the coming presentation.

Bibliography

Donald Phan. (N/A). Ambient Occlusion in xNormal. Available: http://www.donaldphan.com/tutorials/xnormal/xnormal_occ.html. Last accessed 28th Feb 2014.

Sunday 23 February 2014

UDK Import Test Issues

          Over the past week I have been working on the sculpting of my character within ZBrush, and I will post a blog entry soon to show the current state that it is in. For now the work on sculpting has been stopped as I need to focus my priorities on producing what is required for a successful alpha presentation that will soon be upon myself and David. With that being said I began to test the process of importing my character/rig into UDK and whether animation carries across from Maya to UDK correctly.

I began by selecting the skeleton hierarchy and character mesh and exporting into a .FBX format. In doing so Maya presented me with a few errors on export, errors which I have seen before, signalling that the meshes have multiple transform nodes that UDK might not accept. I tried importing this .FBX into UDK and it failed ('Import Failed' with no indication as to why). I figured it was to be expected because of the transform nodes, and so delete the character's non-deformer history which usually resolves the problem, however for this particular case it did not, and to this date I still don't understand why. I wasn't too concerned however because I had come across the same issue in my Game Development module, and knew a work around for it; I made two versions of the rig, one is the completed rig with all the splines, IKs and control curves etc., and one that was a 'clean' version with only the bones and mesh, no constraints or tools on it of any kind. All I'd have to do when it comes to creating and importing the animations would be to animate on the 'complete' skeleton, bake the animations to its bones and then transfer the baked information across to the 'clean' rig via the use of a MEL script.

I tried importing the 'clean' rig into UDK and still I was presented with 'Import Failed'. After hours of looking for answers on the internet and trying various methods I decided to try importing the simplest of rigs to determine whether it was my rig, Maya or UDK that is causing the problem. I created a single bone chain, skinned a sphere to it and tried importing, which again presented as a failed import. So I had presumed it must be a UDK issue, however after trouble shooting I tried the same test of importing the simplest of rigs but this time exported it using Maya 2013 version, and not the 2014 version which I had been using. This worked, and so it also worked for importing my 'clean' rig too. I can only presume that there has been a recent update for Maya 2014's FBX exporter that is causing the issue. Either way, the importing now works and the rig behaves the way I intended it to.

          I now have to focus on creating the alpha-level block out animations ready for the alpha presentation in week 7.

Monday 17 February 2014

Character Update 2, Rigging Issues and ZBrush preparation


Character Update 2


          The character is now fully UV'd and ready for progression into ZBrush for hard surface sculpting. Although the character is mirrored I made the choice to keep the UVs unique as to give me more options when it comes to texturing. The reasoning behind keeping the UVs unique is that it gives me the option to have one side looking differently from the other. I believe this can improve the overall quality of the character as usually mirrored objects are easily noticed, which takes away from the character and removes the viewer from the feeling of the cinematic.

I had to make a few changes to the character topology to allow for better animation deformation of the mesh. After completing the UV layout and rigging the character I noticed that in some areas the mesh still doesn't deform the way I would like it to, however I believe this is because of the rig joint placements rather than the mesh topology, and so a bit of tweaking in both the rig and the skin weights should correct the issue.


Rigging Update


          For rigging I followed the Digital Tutors' tutorial 'Rigging game characters in Maya'.
Fig. 1 Rigging for game characters in Maya - Digital Tutors

          Though this tutorial helped me a great deal I had to make alterations and re-use techniques learnt from the tutorial in other areas of my rig. The rig I created has a good deal more bones and controls as I needed to take control of the shoulder armour, the cape and the skirt and legs independently of one another. I also have a sword in my animation. For the sword I had a number of different thoughts as to how I should rig it. From my experience in another module, Game Dev, I knew that if I wanted to use a weapon as UDK defines a weapon then I would have to have it as a 'plug-in' for the character. Doing it this way would have required research and implementation of scripting/coding for UDK, something I've never done before as this was handled by the programmers in my team for the Game Development module. I didn't have room in my work schedule for research into coding and so I decided not to take that route. I also realised that whilst this is for potential in-game use, the character I am animating is only for the cinematic; the character is not controllable and therefore would not need to have a weapon that could be used, which is what the coding route would have produced.

I looked at two other methods for rigging the weapon to the character. One method was to use locators and having the parent constraint of the weapon being a variable attribute on a controller that defined whether it would be located at the hand or wherever else I might want it, however I realised that the animations for the character could change at a later date, and therefore locators put in a certain position would not suffice as the weapon could only be at one locator position or another, not 'free' to move wherever I wanted it. So with that being crossed off as an option I found a better way (Fig.2): I created an extra bone at the right hand with its own controller, and then skinned the sword mesh to the bone using an orient and point constraint, then point constrained this to the hand control. This meant that controller/bone was in charge of it's own rotation and translation, yet still follows the translation of the hand, which meant I could manipulate the sword to do whatever I want and yet still be part of the rig. My reasoning was that this would produce the best results for what I needed.


Fig. 2 Sword Integration into the Rig
Fig. 3 Rig Set-up
The final rig has bones and controls set up specifically for my character that I created by extrapolating on what I had learnt from the tutorial. These include 3 cape controllers and 6 skirt controllers (3 for each leg) to allow for a greater control over mesh deformation instead of just following the leg inverse kinematic (IK) controls, sword controller and shoulder armour controllers. I contemplated having these controls as extra attributes as to reduce on screen clutter, but decided against it as I find being able to click and quickly move or rotate controls a lot better for animation as it doesn't require you to stop and interpolate numbers into your flow, this helps you to stay creative as you can see what is happening as you are doing it rather than inputting numbers until you are happy with the visual representation.

As a side note, I learnt quite a lot from the Digital Tutors lesson, and through it discovered a new way to set up a spine in your character; I used to have only forward kinematics (FK) on the spine as IK never produced quality results. However, I learnt that you can use control clusters and splines to allow for a very smooth and realistic bending of the spine without having to use FK controls on each individual spine bones.


Rigging Issues


          I have encountered a few issues with the rigging of the character, the most obvious ones to me were the placement of the joints as they didn't allow for the type of deformation of the mesh that I would have liked, however I put this mainly down to my little experience in rigging, as now I have a better understanding of how the mesh will interact with the bones once skinned. Another issue that still exists is the orientation of the wrist bones. Although both hands (wrist bones) rotate on the same local axis, they do it in opposite values in the Y and Z axis; the left hand will rotate in positive space on these axis, whereas the right hand rotates in the negative space on these axis. I have tried using locators and aim constraints to re-orient the right hand to the right direction, but as it stands this doesn't fix the issue and is still a problem. Thankfully this isn't a huge issue, it just means that when animating and using the graph editor one hand will be predominantly in the positive space on the graph, whilst the other in the negative - more of an annoyance than a problem. If I had time to redo the rig I would make sure that the bones are correctly orientated, but for now this isn't a big enough issue for me to dedicate time to it, and so I am moving on.


ZBrush Preparation


          With finishing the UVs and rig I am now moving onto sculpting in ZBrush, which I have not attempted before when it comes to hard sculpting. I separated the model into individual meshes so that I could have them as individual sub-tools within ZBrush, however on import I realised there were a few issues stopping me from properly sculpting on the meshes. After speaking with my team mate David, who has been doing this type of sculpting for the environment, he pointed out that ZBrush prefers quads and not triangle polygons, and that the meshes should be fairly equal in terms of their polygon placement as to make for better sub-divisions. I've spent the majority of the day preparing the mesh topology for ZBrush import, which doesn't need to take into consideration of UVs as all I am doing is preparing the mesh - the low poly with correct UVs stays the same, then all I need to do is sculpt the high poly from the prepared low poly mesh, and transfer the normals onto the UV'd low poly mesh. 


Bibliography

Fig. 1 Digital Tutors. (2011) Rigging Game Characters in Maya, CD-ROM, Digital Tutors. Available: http://www.digitaltutors.com/tutorial/476-Rigging-Game-Characters-in-Maya

Wednesday 5 February 2014

Work Schedules, References and Character Updates.

Micromanaging


         In the last post I spoke about my plan of action to carry out the work that was required to complete this module. I have now made a more detailed schedule of the work I plan to do on each day to help micromanage as much as I can in order to keep me on track for completion. Admittedly I have not modelled a character in a number of years, and so the time slots I have given for certain aspects of my work might be more or less time than is actually required for me to complete it, however as it stands if I keep on track and follow the schedule then the work should get done without too many issues, with the 'polishing' time being enough to correct for any possible contingencies.

Things may have to be moved around according to the updating state of the work and unexpected issues.


Schedule:

Schedule for aspects of A3D module

References


          After the first attempt at the character creation I decided to do a bit more referencing to find the type of hard surface, armour wearing Nordic look that I was aiming for. I had already found and used references from The Hobbit: The Desolation of Smaug; the dwarf stone statues found in the film were very useful for hard surface inspiration. To help out even further I gathered references from the game Skyrim, the armour there is very Norse-esque, and from the Tomb Raider: Underworld concepts.


Fig.1 Skyrim Nordic armour

Fig.2 Tomb Raider: Underworld  concept art

Character Update


          I have completed the character base mesh and have begun UV mapping it. It stands at around 50% UV mapped. I made the decision to use ZBrush's polypaint tool for two specific reasons. The first is that it is something I would like to gain a skill in considering this module is about learning new techniques and technologies in the production of the cinematic. The second reason is because I believe it will produce more interesting results rather than using photo images. This makes the process more linear in its pipeline also, as I can now create the different texture maps and high poly mesh in ZBrush without the need to swap to Photoshop. This means less time spread across multiple pieces of software.

         I created the base mesh using an organic male body as 3D reference for anatomy scale. I have been using Maya's latest set of modelling tools, namely 'Quad Draw' to quickly build a low poly mesh with intuitive methods for repositioning polygons and edge flows for the sake of an animation-ready topology. 


I knew a decent amount about topology for animation already, due to just the nature of being an animator and wanting to know more about the specialisation. However building a model with the correct topology was relatively new to me, and so I found two great sources to understand edge flows and the placements of polygons here http://wiki.polycount.com/CategoryTopology and here cgcookie.com/blender/cgc-courses/learning-mesh-topology-collection/. The second link is focused for blender users, but the knowledge is cross compatible with any 3D software.

Fig.3  Example of topology for animation
I took into consideration that although it needs to be anatomically correct the character is a statue and would have exaggerated features, therefore I increased the volume of the chest / arms. The idea was to keep it looking 'blocky' and hard surfaced like you would expect from a stone statue.

Character base mesh (Front)

Character base mesh (Persp.)

Character base mesh (Side)
From here I need to complete the UV process and then begin rigging and sculpting.


Bibliography

Fig.1  The Elder Scrolls Wiki. (2013). Ahzidal's Armor. Available: http://elderscrolls.wikia.com/wiki/Ahzidal's_Armor?file=AncientNordArmor-Ahzidal.png. Last accessed 5th Feb 2014.

Fig.2 Tomb Raider Hub. (N/A). Tomb Raider Underworld. Available: http://www.tombraiderhub.com/tr8/extras/images/environment42.jpg. Last accessed 5th Feb 2014.

Fig.3 Polycount. (2010). Shoulder Topology. Available: http://wiki.polycount.com/ShoulderTopology?highlight=%28%5CbCategoryTopology%5Cb%29. Last accessed 5th Feb 2014.

Wednesday 29 January 2014

Character Concept and Changes

          Over the last few days I have been gathering reference to help with my character concepts. I've spent time looking at Norse/Viking era clothing, armour and weapons to produce something that would work with the environment.
Norse clothing references gathered
From this I used a base 3D model of a male human and made renders of it. From that I sketched over the renders as it helped to understand how all the amour and clothing would fit together. 


Norse character concept
After showing it to David and gaining feedback I went ahead and started blocking out the armour, beginning with the helmet. I did this in Maya and used one of their tools called quad drawing which made it move along fairly quickly.


Helmet Blockout

After this I gained some feedback from my lecturer, who rightly pointed out that this is far too organic to be a statue. After talking about what I could possibly do we came to a conclusion that I would be better off simplifying the model, making it more angular and more stone-like. With that being said here is my new set of references to give an idea of what I now intend to model:
Statue References
You can see from the latest set of references that I am now aiming to make the statue angular, even more so than the statues in the image, with strong lines. There are also weapons and a shield reference there which I want to add to the character, possibly dual wielding two hand axes, or just one large axe like that statue reference is in the top left.


New 'statue' concept


Tuesday 21 January 2014

Planning Stage

          This post will cover my planning stage of the module, detailing the changes that will be made that aren't found in the concept art in order to incorporate my role as character and animation artist. I will also explain my plan for actually producing the art, including reference work, mood boards and the block out ideas we have for the cinematic.

Concept Art Adaptations

          The piece of concept art that we are working from shows no humanoid sculptures. For me to carry out my role in the group, David and I spoke about the changes that would need to be made from the concept art. We decided that instead of having the large body of water in the concept art that goes underground, we would instead have a pool of water that surrounds a base that a sculpture of a Norse-like human would stand on. This sculpture will either come to life or will crumble to reveal a character that would then attack the camera. The water would have come from a broken piece of wall nearby that would have otherwise held it in. There are also a few more alterations that will be made by David to enhance his work in regards to making the scene adhere to the module assignment. These changes include increasing the size of the environment so that it could host a player moving around in it, adding more detail to the wall, and removing the ceiling of the scene to give way to better lighting.


Fig.1 In game version of the concept art. (Derek Jenson)
Plan of Action

          In order to create a sculpture/character that is suited to the environment I will produce a mood board to represent what I think the environment is showing. Reference is also key to creating a character, and looking into Norse characteristics and art will help me do so.

The plans for the cinematic are fairly loose at the moment, with David and I discussing camera movements that will both show off the detail and important elements in his environment work as well as show off the character animation. Making sure that these two work well with each other and flow from one to the other seamlessly is important. As of now we think the camera should start by coming through the door and archway, moving around the scene in a yet unspecified manner and then the door possibly slamming shut, with the sculpture then coming to life. This plan will no doubt be more detailed and changed throughout my posts as we gain a better understanding on how to make our two roles work together.

          To create the character I plan to use ZBrush, possibly focusing on hard-surface modelling for the sculpture, and soft-surface modelling if there is to be a character within the sculpture.

I am predominately an animator, it is what I am specialising in and have not spent a great deal of time on character art or rigging. As mentioned in an earlier post, one of the key parts to this module assignment is that we use techniques and/or technology that we have not used before. Therefore character modelling and rigging will fill this role for me, especially as I have never used hard-surface sculpting in ZBrush and never made beyond a basic rig.


Broken down into the simplest form, my plans for this module are to:

  • Gather references and create a mood board.
  • Create character concepts.
  • Research ZBrush for what I am using it for (hard surface sculpting, etc.)
  • Model character through use of ZBrush and Maya, including textures.
  • Research rigging methodology, focusing on rigs for games.
  • Rig character using Maya
  • Storyboard animation/camera/cinematic
  • Composite team work for final product
These points are not necessarily in a specific order, as I will no doubt need to revisit some areas. All of this will be done with constant feedback and collaboration with David for the best possible results.


Bibliography

Derek Jenson. Tomb Raider Underworld. Available: http://www.derekjenson.com/tomb-raider-underworld.html. Last accessed 21st January 2014.

Module Introduction

          For this module we are required to build a 3D scene using a piece of concept art. The scene has to be built in such a way that it could be played and therefore must take into consideration how a character would move around and interact with the environment, however the module itself does not require it to be literally playable. The concept art has not been given any restrictions, meaning we can use any form of media from film and TV, to books and game art. We have been given the choice of working in a team of two or on ourselves. I will be working with David Keymer, whereby my role in the team is the character and animation artist, and David's role is the environment artist.

As some people in my course are focusing on roles other than environment art, myself included, we were given the option to do rigging and animation under the condition that we also do the character art. 


This module requires that we incorporate techniques and technology that we have not used before, thereby encouraging us to learn different methods that could better our understanding of the roles we are specialising in.

The final piece does not have to be the exact replica of the concept art, as we have been told that we can deviate from the original concept but only as to add to the scene in a way that compliments it, i.e. we should not deviate from it so much that it is unrecognisable, or have elements that could not be artistically justified in working with the original concept. This final piece will be a 30 to 60 seconds long cinematic.


          David had already been looking into and blocking out a piece of concept art that was used for Tomb Raider: Underworld (Figure 1).

Fig.1
After conversing with him about how I could contribute to the piece using character art and animation we came to a rough conclusion about what we plan to do, which I will detail in my planning post. I was happy to work with David and I think the concept art he found has a lot of potential for both of us to produce some great work.