Character Update 2
I had to make a few changes to the character topology to allow for better animation deformation of the mesh. After completing the UV layout and rigging the character I noticed that in some areas the mesh still doesn't deform the way I would like it to, however I believe this is because of the rig joint placements rather than the mesh topology, and so a bit of tweaking in both the rig and the skin weights should correct the issue.
Rigging Update
 |
| Fig. 1 Rigging for game characters in Maya - Digital Tutors |
Though this tutorial helped me a great deal I had to make alterations and re-use techniques learnt from the tutorial in other areas of my rig. The rig I created has a good deal more bones and controls as I needed to take control of the shoulder armour, the cape and the skirt and legs independently of one another. I also have a sword in my animation. For the sword I had a number of different thoughts as to how I should rig it. From my experience in another module, Game Dev, I knew that if I wanted to use a weapon as UDK defines a weapon then I would have to have it as a 'plug-in' for the character. Doing it this way would have required research and implementation of scripting/coding for UDK, something I've never done before as this was handled by the programmers in my team for the Game Development module. I didn't have room in my work schedule for research into coding and so I decided not to take that route. I also realised that whilst this is for potential in-game use, the character I am animating is only for the cinematic; the character is not controllable and therefore would not need to have a weapon that could be used, which is what the coding route would have produced.
I looked at two other methods for rigging the weapon to the character. One method was to use locators and having the parent constraint of the weapon being a variable attribute on a controller that defined whether it would be located at the hand or wherever else I might want it, however I realised that the animations for the character could change at a later date, and therefore locators put in a certain position would not suffice as the weapon could only be at one locator position or another, not 'free' to move wherever I wanted it. So with that being crossed off as an option I found a better way (Fig.2): I created an extra bone at the right hand with its own controller, and then skinned the sword mesh to the bone using an orient and point constraint, then point constrained this to the hand control. This meant that controller/bone was in charge of it's own rotation and translation, yet still follows the translation of the hand, which meant I could manipulate the sword to do whatever I want and yet still be part of the rig. My reasoning was that this would produce the best results for what I needed.
I looked at two other methods for rigging the weapon to the character. One method was to use locators and having the parent constraint of the weapon being a variable attribute on a controller that defined whether it would be located at the hand or wherever else I might want it, however I realised that the animations for the character could change at a later date, and therefore locators put in a certain position would not suffice as the weapon could only be at one locator position or another, not 'free' to move wherever I wanted it. So with that being crossed off as an option I found a better way (Fig.2): I created an extra bone at the right hand with its own controller, and then skinned the sword mesh to the bone using an orient and point constraint, then point constrained this to the hand control. This meant that controller/bone was in charge of it's own rotation and translation, yet still follows the translation of the hand, which meant I could manipulate the sword to do whatever I want and yet still be part of the rig. My reasoning was that this would produce the best results for what I needed.
 |
| Fig. 2 Sword Integration into the Rig |
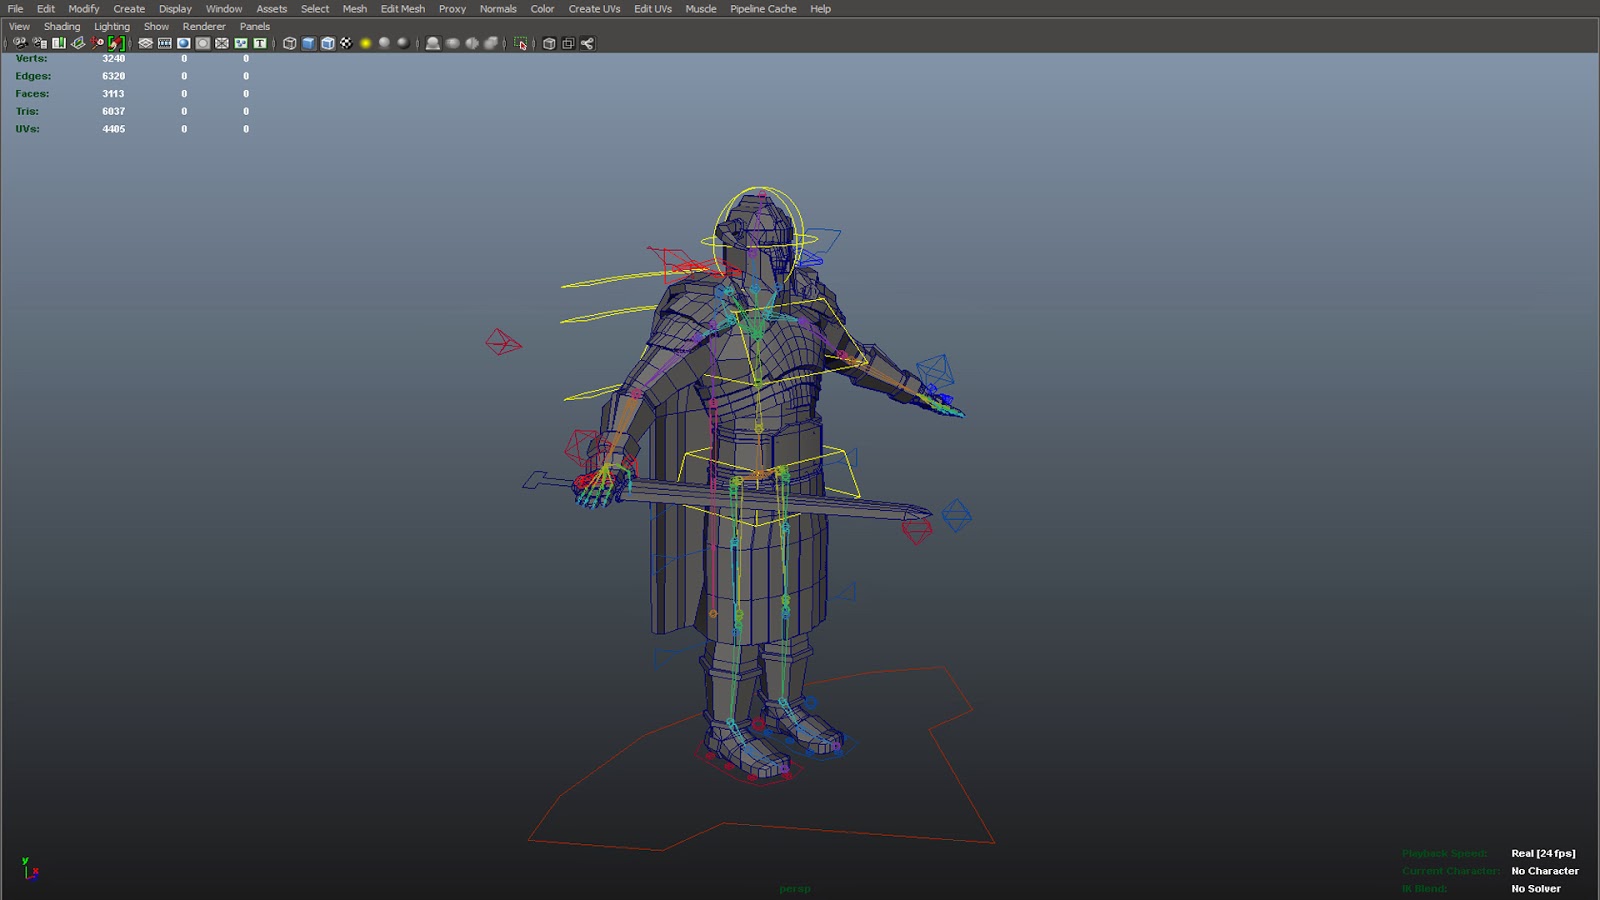 |
| Fig. 3 Rig Set-up |
The final rig has bones and controls set up specifically for my character that I created by extrapolating on what I had learnt from the tutorial. These include 3 cape controllers and 6 skirt controllers (3 for each leg) to allow for a greater control over mesh deformation instead of just following the leg inverse kinematic (IK) controls, sword controller and shoulder armour controllers. I contemplated having these controls as extra attributes as to reduce on screen clutter, but decided against it as I find being able to click and quickly move or rotate controls a lot better for animation as it doesn't require you to stop and interpolate numbers into your flow, this helps you to stay creative as you can see what is happening as you are doing it rather than inputting numbers until you are happy with the visual representation.
As a side note, I learnt quite a lot from the Digital Tutors lesson, and through it discovered a new way to set up a spine in your character; I used to have only forward kinematics (FK) on the spine as IK never produced quality results. However, I learnt that you can use control clusters and splines to allow for a very smooth and realistic bending of the spine without having to use FK controls on each individual spine bones.
I have encountered a few issues with the rigging of the character, the most obvious ones to me were the placement of the joints as they didn't allow for the type of deformation of the mesh that I would have liked, however I put this mainly down to my little experience in rigging, as now I have a better understanding of how the mesh will interact with the bones once skinned. Another issue that still exists is the orientation of the wrist bones. Although both hands (wrist bones) rotate on the same local axis, they do it in opposite values in the Y and Z axis; the left hand will rotate in positive space on these axis, whereas the right hand rotates in the negative space on these axis. I have tried using locators and aim constraints to re-orient the right hand to the right direction, but as it stands this doesn't fix the issue and is still a problem. Thankfully this isn't a huge issue, it just means that when animating and using the graph editor one hand will be predominantly in the positive space on the graph, whilst the other in the negative - more of an annoyance than a problem. If I had time to redo the rig I would make sure that the bones are correctly orientated, but for now this isn't a big enough issue for me to dedicate time to it, and so I am moving on.
With finishing the UVs and rig I am now moving onto sculpting in ZBrush, which I have not attempted before when it comes to hard sculpting. I separated the model into individual meshes so that I could have them as individual sub-tools within ZBrush, however on import I realised there were a few issues stopping me from properly sculpting on the meshes. After speaking with my team mate David, who has been doing this type of sculpting for the environment, he pointed out that ZBrush prefers quads and not triangle polygons, and that the meshes should be fairly equal in terms of their polygon placement as to make for better sub-divisions. I've spent the majority of the day preparing the mesh topology for ZBrush import, which doesn't need to take into consideration of UVs as all I am doing is preparing the mesh - the low poly with correct UVs stays the same, then all I need to do is sculpt the high poly from the prepared low poly mesh, and transfer the normals onto the UV'd low poly mesh.
As a side note, I learnt quite a lot from the Digital Tutors lesson, and through it discovered a new way to set up a spine in your character; I used to have only forward kinematics (FK) on the spine as IK never produced quality results. However, I learnt that you can use control clusters and splines to allow for a very smooth and realistic bending of the spine without having to use FK controls on each individual spine bones.
Rigging Issues
ZBrush Preparation
Bibliography
Fig. 1 Digital Tutors. (2011) Rigging Game Characters in Maya, CD-ROM, Digital Tutors. Available: http://www.digitaltutors.com/tutorial/476-Rigging-Game-Characters-in-Maya
No comments:
Post a Comment